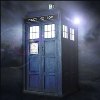
The image used in this tutorial is:

(Image Credit to heat-land.com)
Now to avvie it:
1. Crop the part of the image you want, then shirnk the image to 100x100 pixels, or, if not a perfect square, make the larger integer of the width/height 100 pixels for the average avatar size. Sharpen it once, or more depending on the quality of the image.

NOTE: If there are shiny/blotchy areas in the first image, before you do the second step, use the blur tool at 50% strength to blend them out so it looks more airbrushed.
2. Make 2 copies of this image, by right-clicking it and choosing 'Duplicate Layer...' Don't worry about layer names. Set the first copy to Screen 25% opacity, and set the top copy to soft light 100%.

3. Create a new blank layer. Using the paintbucket tool, floodfill the new layer with the colour at #030437. Set the layer to exclusion 100%.

4. Create another blank layer. This time, floodfill the colour at #FFDFAD. Set this layer to Multiply 50%. Duplicate the BACKGROUND ONLY, and set this new copy on top with soft light 100%.

5. GRADIENT TIME! Using new layers each time, and in this order, gradient these:
 soft light, 79%
 lighten, 35%
 Overlay, 50%
They all add up to this:

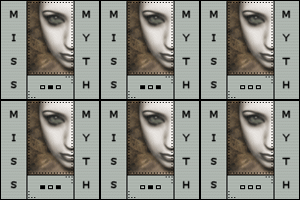
6. Using the below light texture, I set it to screen 100% over everything.
 -->
--> 
NOTE: If you need to, you can move that last layer around so that the light particles don't interfere with the picture.
7. Then, put another soft light copy of the background on top, at 58% opacity, to make the image show through better.

8. Add any words, tiny text, or brush patterns you need to now, on a new layer.

--------------MERGE ALL LAYERS---------------
Now for a border.
9. Using the single column marquee tool, highlight the space 1 pixel from the left edge. (ex. a 1 pixel gap between the edge and the marquee)(NOTE: YOU MAY NEED TO ZOOM IN TO PERFECTLY ALIGN IT) Using a large brush, switch to colour white, or #FFFFFF. Fill in the area in the single marquee you made. Don't worry, the colour won't leave the single marquee. Do the same thing to the right side.

10. Using the single row marquee tool, do the same thing to the top and bottom, filling in white lines 1 pixel away from the edge.

11. This time, using the signle column marquee, select the gap in between the white and the edge, making sure you are selecting the pixel right against the edge. Using the brush, fill in the marquee with black, or #000000. Do the same to the right side. Using the row marquee, do the same to the top and bottom.
~~~~~~~~~~~~~~~~~~~~~~~~~~~~~~~~~~~~~~~~~~~~~~~~~
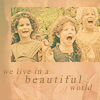
AND IT'S DONE!

Remember, don't follow these instructions exactly, use your own images and colours and effects. Experiment with it!
If you have any questions, ask me. Duh

Lemme see what you can do! Post what you made with this tutorial on this thread!